Cardmaking Tips and Tricks: Mastering Cutting Dies for Intricate Designs
Have you ever found it troublesome to create precise and intricate shapes on your card? Then Die-cutting is a must-try for you. It is an easy and popular technique for adding patterns and details effortlessly. Whether you're a beginner or an experienced crafter, understanding the basics and learning some tips and tricks can elevate your game. In this blog post, we will offer insights on how to use cutting dies effectively and share tips for creating intricate die-cut designs. Let's get started!
Choosing the Right Cutting Die:
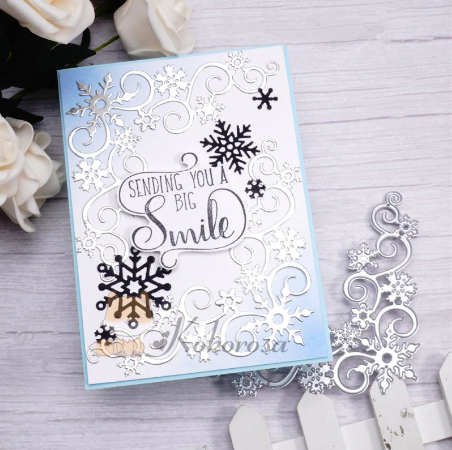
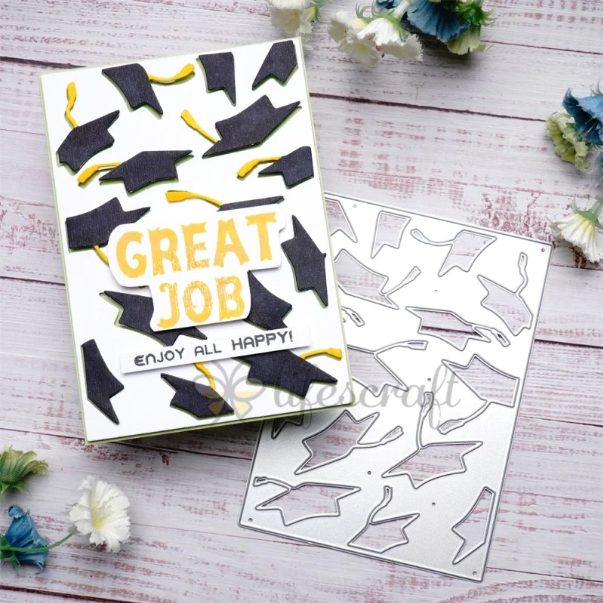
Invest in high-quality cutting dies that are compatible with your die-cutting machine. Kokorosa provides metal cutting dies of high quality that can produce clean and crisp die cuts on various materials of different thicknesses. They are also versatile and have a variety of shapes and sizes for maximum creativity.
Prep Your Materials:
Before die-cutting, prepare your materials by adhering them with low-tack tape or temporary adhesive to ensure they stay in place during cutting. This step is especially crucial for intricate or delicate designs. Additionally, consider using specialized metal or precision plates for intricate dies to get cleaner and more precise cuts.
Positioning and Alignment:
Use transparent acrylic plates with pre-printed or pre-drawn grids or guidelines for accurate and desired placements of your dies and cardstock. Double-check to avoid any mistakes before running it through the machine.
Run Multiple Passes:
Normally, our dies have sharp enough edges to give you crisp cuts with one run. But when working with thicker materials like foam or fabrics, consider running the materials through the die-cutting machine multiple times for intricate and detailed die-cuts. Experiment with different pressure settings and stack additional shims or cardstock layers for increased pressure if necessary.
Play with Cardstock and Specialty Materials:
Expand your creativity by experimenting with various types of cardstock and specialty materials. Different weights, textures, and finishes can add visual interest to your die-cut designs. Try using shimmer cardstock, glitter paper, vellum, or fabric to create unique effects. You can choose from our large selection of stunning cardstock.
Get Creative with Inlay and Layering:
Inlay and layering techniques can elevate your die-cut designs. With the inlay technique, cut out intricate shapes from different colored papers or cardstock and insert them back into the original design. Layering involves stacking die-cut pieces to add dimension and depth. These techniques add a brilliant touch and allow you to create multi-colored and complex projects.
Embellish and Highlight:
After die-cutting, enhance your designs by adding embellishments or highlighting certain elements. Use markers, pens, or watercolors to add shading or details to the die-cut shapes. Embossed patterns, glitter, or foiling can bring your designs to life. Don't be afraid to experiment and let your creativity shine!
Clean and Maintain Your Dies:
Regularly clean your dies to maintain the quality of your cuts. Use a lint roller or a soft brush to remove any paper or debris stuck in the crevices. If necessary, use a die brush or a piece of foam to poke out any small pieces still attached to the die.
Conclusion:
By following these tips and tricks, you can use cutting dies effectively and create intricate and stunning die-cut designs for your cards. Remember, practice makes perfect, so don't be afraid to experiment and push the boundaries of your creativity!
Choosing the Right Cutting Die:
Invest in high-quality cutting dies that are compatible with your die-cutting machine. Kokorosa provides metal cutting dies of high quality that can produce clean and crisp die cuts on various materials of different thicknesses. They are also versatile and have a variety of shapes and sizes for maximum creativity.
Prep Your Materials:
Before die-cutting, prepare your materials by adhering them with low-tack tape or temporary adhesive to ensure they stay in place during cutting. This step is especially crucial for intricate or delicate designs. Additionally, consider using specialized metal or precision plates for intricate dies to get cleaner and more precise cuts.
Positioning and Alignment:
Use transparent acrylic plates with pre-printed or pre-drawn grids or guidelines for accurate and desired placements of your dies and cardstock. Double-check to avoid any mistakes before running it through the machine.
Run Multiple Passes:
Normally, our dies have sharp enough edges to give you crisp cuts with one run. But when working with thicker materials like foam or fabrics, consider running the materials through the die-cutting machine multiple times for intricate and detailed die-cuts. Experiment with different pressure settings and stack additional shims or cardstock layers for increased pressure if necessary.
Play with Cardstock and Specialty Materials:
Expand your creativity by experimenting with various types of cardstock and specialty materials. Different weights, textures, and finishes can add visual interest to your die-cut designs. Try using shimmer cardstock, glitter paper, vellum, or fabric to create unique effects. You can choose from our large selection of stunning cardstock.
Get Creative with Inlay and Layering:
Inlay and layering techniques can elevate your die-cut designs. With the inlay technique, cut out intricate shapes from different colored papers or cardstock and insert them back into the original design. Layering involves stacking die-cut pieces to add dimension and depth. These techniques add a brilliant touch and allow you to create multi-colored and complex projects.
Embellish and Highlight:
After die-cutting, enhance your designs by adding embellishments or highlighting certain elements. Use markers, pens, or watercolors to add shading or details to the die-cut shapes. Embossed patterns, glitter, or foiling can bring your designs to life. Don't be afraid to experiment and let your creativity shine!
Clean and Maintain Your Dies:
Regularly clean your dies to maintain the quality of your cuts. Use a lint roller or a soft brush to remove any paper or debris stuck in the crevices. If necessary, use a die brush or a piece of foam to poke out any small pieces still attached to the die.
Conclusion:
By following these tips and tricks, you can use cutting dies effectively and create intricate and stunning die-cut designs for your cards. Remember, practice makes perfect, so don't be afraid to experiment and push the boundaries of your creativity!


Leave a comment